7 Ways to Layer Lighting in a Living Room, Compared: Fixtures, Smart Systems, and Layout Tricks
By Camille Moreau, Lead Interior Designer · September 14, 2026
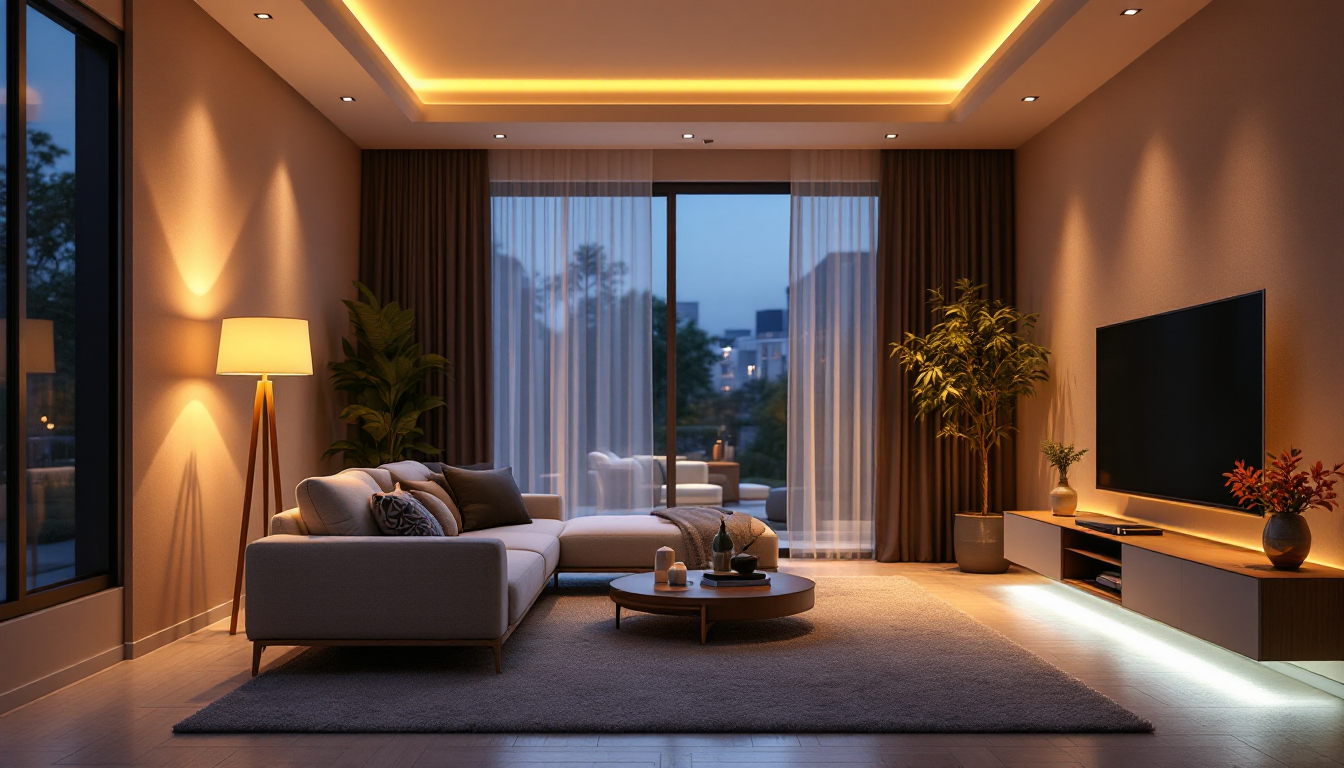
Why "layered lighting" isn't one single fix
Every living room needs the same three functions covered—ambient, task, and accent light—but there are several legitimate ways to get there, depending on your budget, your ceiling, and whether you rent or own. If you're still fuzzy on the core vocabulary of ambient, task, and accent lighting, our beginner's guide to layering lighting covers those fundamentals in depth. This article assumes you know the basics and instead compares the actual tools and approaches you'd choose between when furnishing a real room.
Below are seven methods, roughly ordered from lowest effort/cost to most involved, with honest trade-offs for each.
1. Plug-in lamps only (no rewiring)
The simplest layering strategy: a floor lamp for ambient fill, a table lamp for task light near seating, and a smaller accent lamp or string lights for mood. This works in almost any rental because it requires zero electrical work.
- Pros: Cheap, flexible, fully reversible, easy to move as furniture changes.
- Cons: Cords are visible unless you plan outlet placement carefully; ambient coverage can feel uneven in larger rooms.
- Best for: Renters, small living rooms, first apartments.
2. Ceiling fixture + lamps (the "starter layer")
Most homes come with one central ceiling fixture. Pairing it with one or two lamps gives you a basic two-layer system without any new wiring—just add fixtures to what's already there.
- Pros: Low cost, uses existing wiring, quick to set up.
- Cons: A single overhead source often creates flat, top-down light and harsh shadows on faces; rarely enough on its own.
- Best for: Budget-conscious updates where you're not ready to change electrical layout.
3. Recessed and track lighting (architectural ambient)
Recessed cans or track heads spread ambient light evenly across the ceiling plane and can be aimed to wash walls or highlight art, doing double duty as ambient and accent layers. This requires an electrician or a renovation window, so it's a bigger commitment than lamps.
- Pros: Clean look, no visible fixtures competing with décor, dimmable zones possible.
- Cons: Installation cost and disruption; poor placement (too few cans, wrong beam angle) is expensive to fix later.
- Best for: Renovations, open-plan living rooms, homeowners planning ahead with a floor plan.
4. Smart bulbs and app-controlled scenes
Smart bulbs (screw-in, no rewiring needed) let you set warm dim scenes for movie night and brighter cool-toned scenes for cleaning or hosting, all from one app or voice command. This is less about new fixtures and more about controlling the ones you already have.
- Pros: Instant flexibility, scheduling, color temperature control, works with existing lamps and ceiling fixtures.
- Cons: Ongoing subscription or hub costs for some ecosystems; Wi-Fi dependency; can feel gimmicky if scenes aren't planned around actual activities.
- Best for: Tech-comfortable households who want one system to manage across all three lighting layers.
5. Wall sconces and picture lights
Sconces add a mid-height layer that lamps and ceiling fixtures can't reach, softening the vertical gradient of light in a room. Picture lights do similar work as focused accent pieces. Both usually need a licensed electrician unless you choose plug-in sconce versions.
- Pros: Frees up floor and table space, adds visual interest at eye level, great for narrow rooms where lamps would crowd walkways.
- Cons: Fixed placement means less flexibility if you rearrange furniture later.
- Best for: Rooms with limited floor space, hallway-adjacent living rooms, gallery walls.
6. LED strip and cove lighting
Hidden LED strips behind a media console, under floating shelves, or in a ceiling cove create soft, indirect accent light that reads as ambiance rather than a visible source. It pairs well with the neutral-plus-accent color balance described in the 60-30-10 color rule, since warm strip lighting can reinforce your accent color at night.
- Pros: Modern, subtle, relatively inexpensive for the effect; many kits are DIY-friendly with adhesive backing.
- Cons: Cheap strips yellow or dim over time; visible LED dots if diffuser channels aren't used.
- Best for: Media rooms, floating shelves, rooms with strong furniture silhouettes worth highlighting.
7. Full lighting design plan (planned before renovation)
The most thorough option: mapping every fixture, switch, and dimmer against your actual floor plan before any wiring goes in. This is where tools that let you preview furniture and light placement together are genuinely useful—modeling a room in a home design planning tool lets you check sightlines and shadow patterns before committing to can light positions. Understanding standard floor plan symbols also helps if you're reading an electrician's layout drawings.
- Pros: Avoids costly redos, ensures all three layers work together instead of being bolted on separately, best long-term result.
- Cons: Requires upfront time and often a professional; not practical for renters or quick refreshes.
- Best for: New builds, full renovations, anyone rewiring a living room from scratch.
Quick comparison
- Lowest cost, most flexible: Plug-in lamps only
- Best for renters wanting more control: Smart bulbs
- Best visual polish: Recessed/track lighting or sconces
- Best for highlighting furniture and shelving: LED strips
- Best long-term investment: A full planned lighting design
Choosing what actually fits your room
Most living rooms end up using a mix from this list rather than one pure approach—lamps plus smart bulbs, or recessed lighting plus a sconce for accent. Start with whichever option matches your timeline and budget, then add layers as needed. If you're furnishing the room around your new lighting plan, it's worth revisiting furniture placement too, since a well-lit room and a well-proportioned layout reinforce each other, much like the layout tricks covered in guides on making a small room feel bigger.